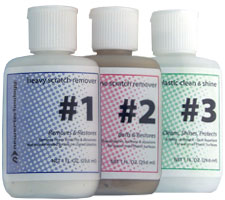
#1 Heavy Scratch Remover
Requires use of #2 for final finishing
Shake well. Test in an inconspicuous
area.
Apply #1 liberally. Using a clean,
soft cloth, polish with a firm back-
and-forth motion at right angles to
the scratches. Keep the cloth
saturated with polish at all times.
Continue polishing until only fine
scratches remain. Using a clean
cloth, it is important to remove all
remaining polish!
Using a clean cloth, apply #2 in a
circular motion uniformly to entire
surface. Polish using light pressure
until #2 dries to a light haze.
Using a clean portion of the cloth,
buff the surface clean. Follow with
#1 for best results. |
#2 Fine Scratch Remover
Shake well. Test in an inconspicuous
area.
Apply #2 liberally. Using a clean,
soft cloth, polish with a firm back-
and-forth motion at right angles to
the scratches. Keep the cloth
saturated with polish at all times.
When the worst scratches have been
polished out, reapply #2 uniformly in
a circular motion to the entire
surface using short, circular strokes
and light pressure. Allow to dry to a
light haze.
Using a clean portion of the cloth,
buff the surface to a slippery glaze
using firm, short strokes. This
procedure is imperative in achieving
the best results. For heavy scratches,
multiple applications of #2 or
application of #1 may be required.
Follow with #3 for best results. |
#3 Plastic Clean & Shine
If the surface is extremely dirty,
apply #3 liberally and wipe using
long, sweeping strokes. Do not use
pressure at this time or large dirt
particles may scratch the plastic.
Re-apply #3. Polish using short,
circular strokes with a clean portion
of the cloth.
When surface is thoroughly clean and
uniformly covered, buff to a slippery
glaze with a clean portion of the
cloth. Surfaces buffed to a high glaze
are more resistant to dust and
future scratching.
Reapply #3 regularly to maintain the
antistatic, smudge and scratch
resistant properties.
 |