OS X Drive Formatting Guide:
Using Disk Utility with: OS X 10.6 – OS X 10.10
Introduction:
Within Disk Utility, the hard drive or SSD is referred to as a "disk". It is represented in the list of drives on the left side of the window, usually by a silver or yellow hard drive icon. Note that icons representing the physical device are never indented in the list.
The named, logical space that is set aside within the disk is called a "volume". A volume is also represented by hard drive icons, but they are indented beneath the disk where they are stored. Shown at right, the items named Snow Leopard, Lion, Mountain Lion, Mavericks, and Yosemite are all examples of volumes found within the disk listed as "256.06 GB SanDisk SSD." Unlike volume names, disk names cannot easily be modified; they are set at the manufacturing facility.
Every disk used with OS X needs to be "partitioned" with one or more volumes. When you partition a disk, all of the volumes that are created are formatted as part of the process. That is what we'll be doing.
Please note that Apple's Disk Utility has remained virtually unchanged from OS X 10.6 thru OS X 10.10. While this document shows screenshots from OS X 10.10, the options shown are available in earlier versions of the OS going back to 10.6. Earlier versions of OS X account for a tiny fraction of users and are not covered in this document, but the process is very similar.
STEP 1: Opening Disk Utility

Click the magnifying glass icon in the top- right corner of your screen. Type (without quotes) "Disk Utility". The first search result should automatically highlight the application. Press the Return key to launch the application.
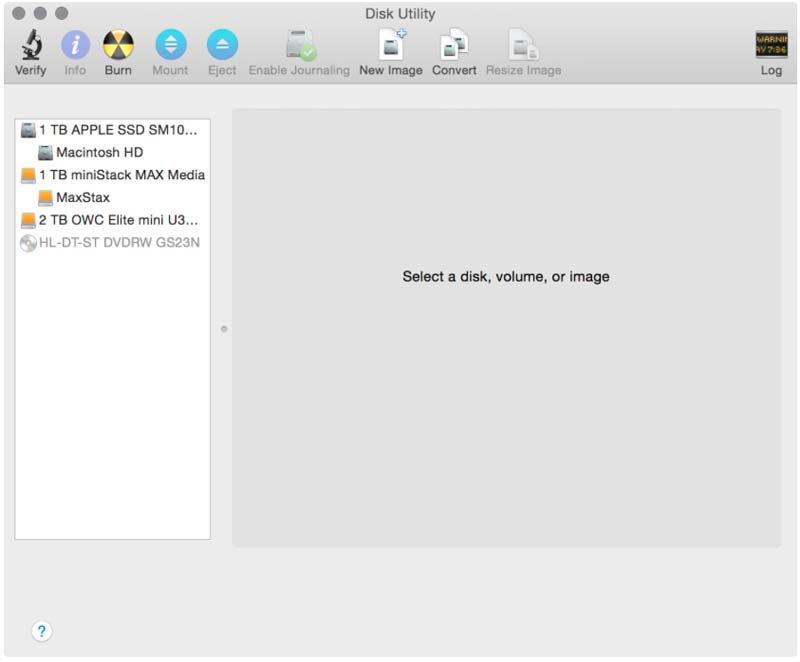
STEP 2: Select the Drive
IMPORTANT:
Re-partitioning a drive using these steps will erase all data on the drive. Please be sure you have a full backup first!
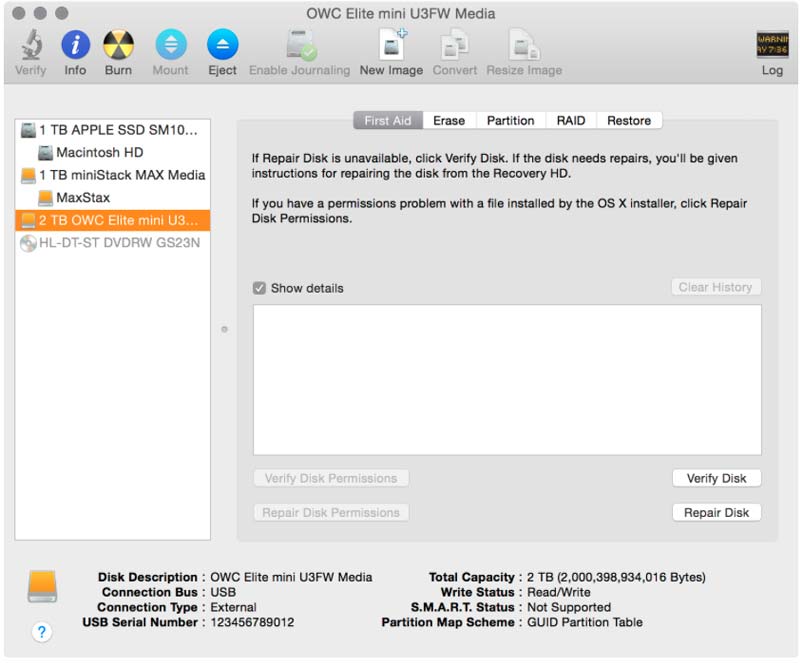
Optionally, to verify the drive is working normally, click the "Verify Disk" button. After a minute or two a simple report will show up in the white box notifying you if there are problems. If so, click the "Repair Disk" button to try and resolve the issues.
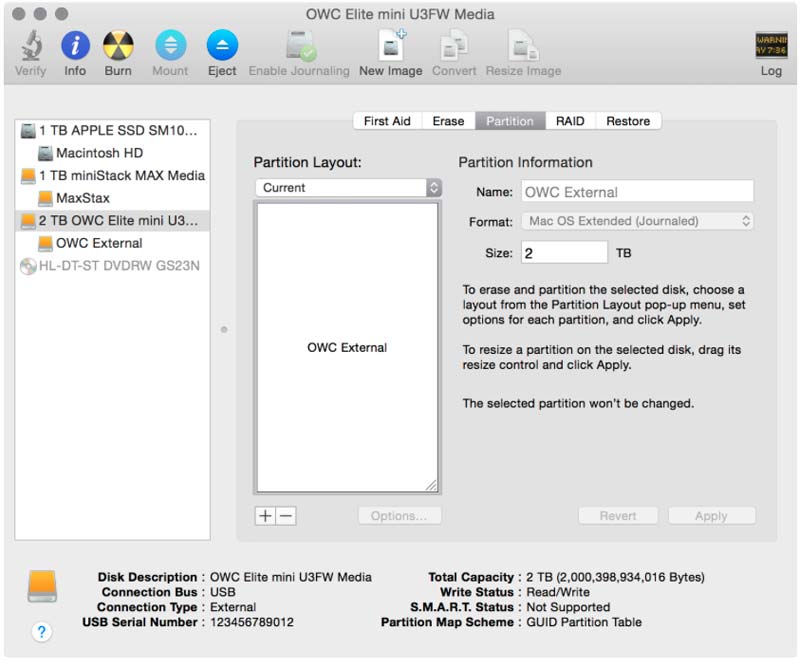
STEP 3: Partition Options

Note: if you wish to create two or more partitions, you can select that number from the menu and then manage their size relative to one another by dragging the divider between them, displayed in the area under the menu (not shown). Each partition will need to have a unique name, and each can have its own Format setting, if needed. For example you could set one partition to use a Mac format, and another to work with PCs.
STEP 4a: Name Your Drive

Note: by default the format called "Mac OS Extended (Journaled)" option is selected for use with OS X, and the Size will default to the full capacity of the drive. These settings are appropriate for most purposes. If you wish to use the disk with both Mac and PCs, please see Step 4b on the next page.
STEP 4b *Optional*: The ExFAT Option
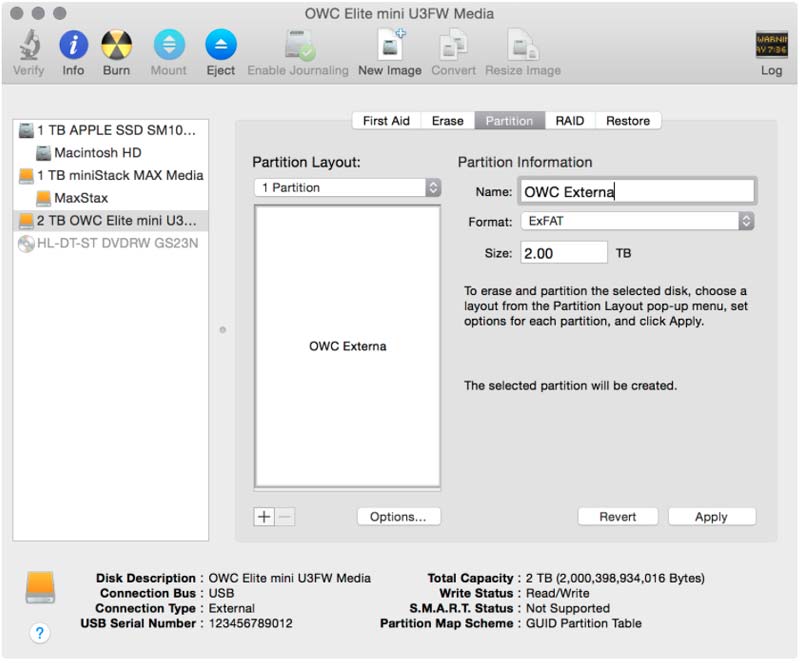
Note: longer names may be shortened automatically when choosing this option.
STEP 5: Select "GUID Partition Table"
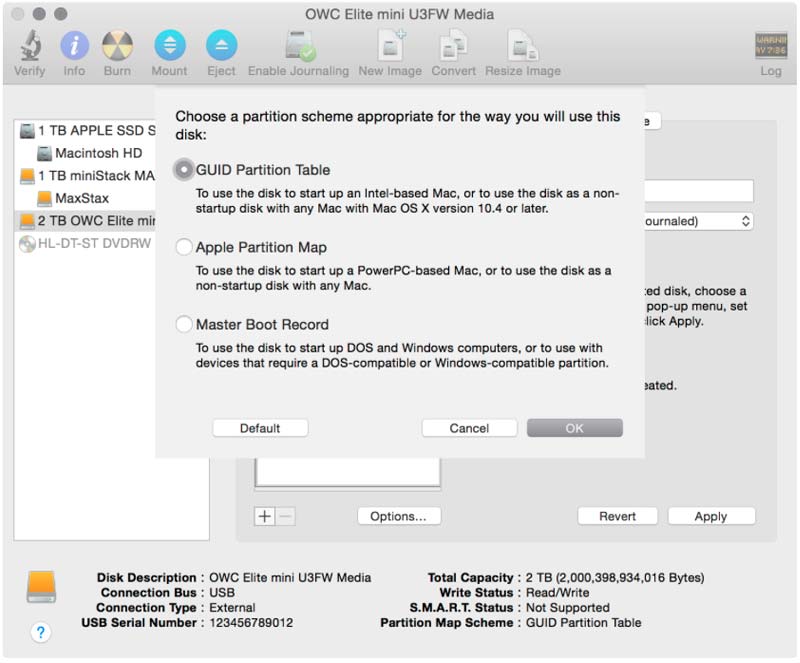
By default GUID Partition table should be set, but if your drive was formatted previously (at the factory or elsewhere) it may use a different partition scheme. For this reason, it’s always a good idea to check.
STEP 6: Create Your Drive
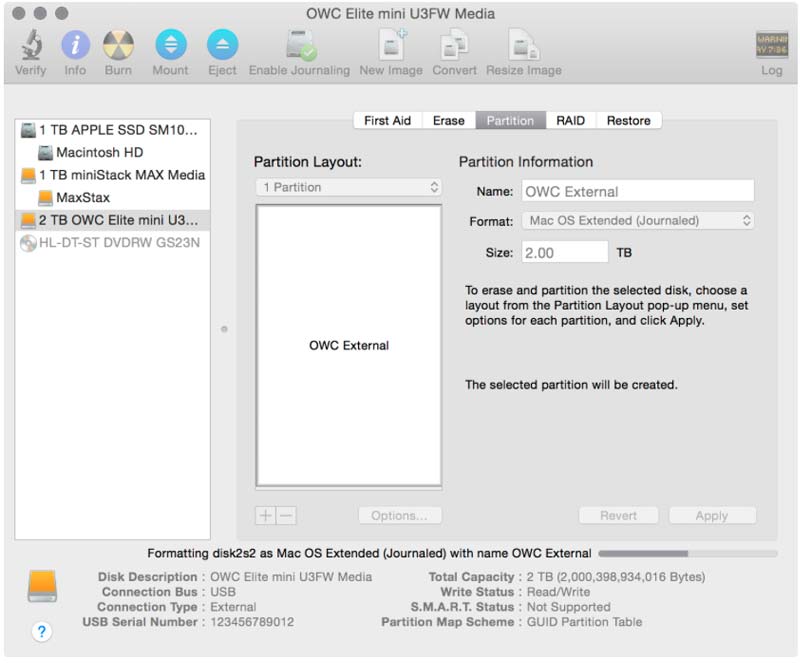
You will be asked if you are "sure you want to partition the disk." Click the "Partition" button when you are ready. The partitioning and formatting process may take a minute or two depending on the size of the disk and the number of partitions being created (while waiting the window should look like what you see at right).