
Windows Formatting Guide:
Using Disk Management with Windows Vista, Windows 7, Windows 8.x, and Windows 10
Getting Started: Finding & Launching Disk Management
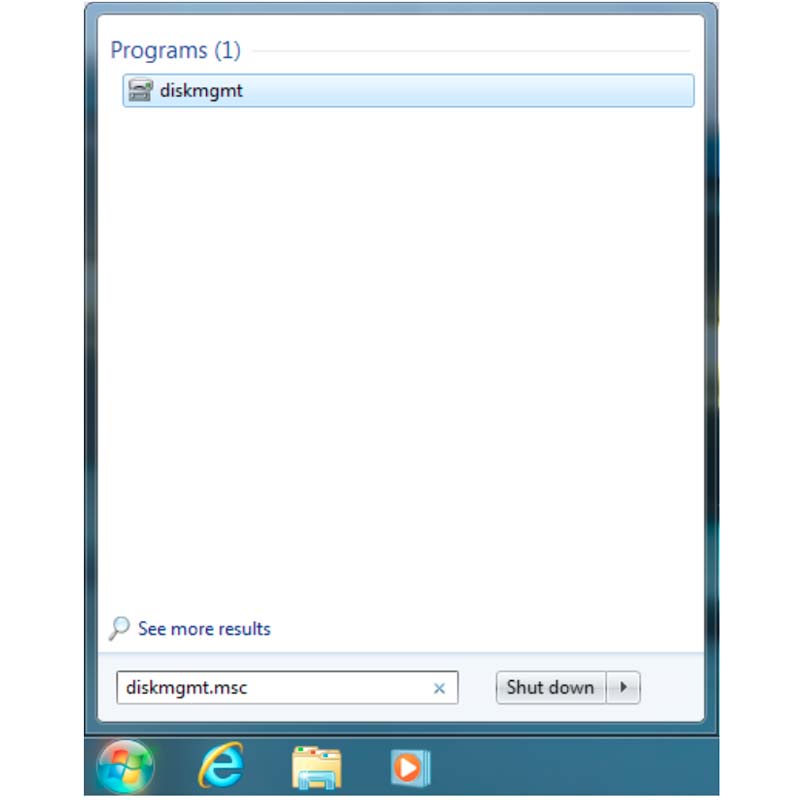
Windows Vista, Windows 7
Click the Start Menu and type "diskmgmt.msc" into the search bar. This should return a result above the search bar (Windows 7 shown). Press Enter to launch Disk Management.
When ready, please skip to Step 1 if you're using Windows Vista or Windows 7.
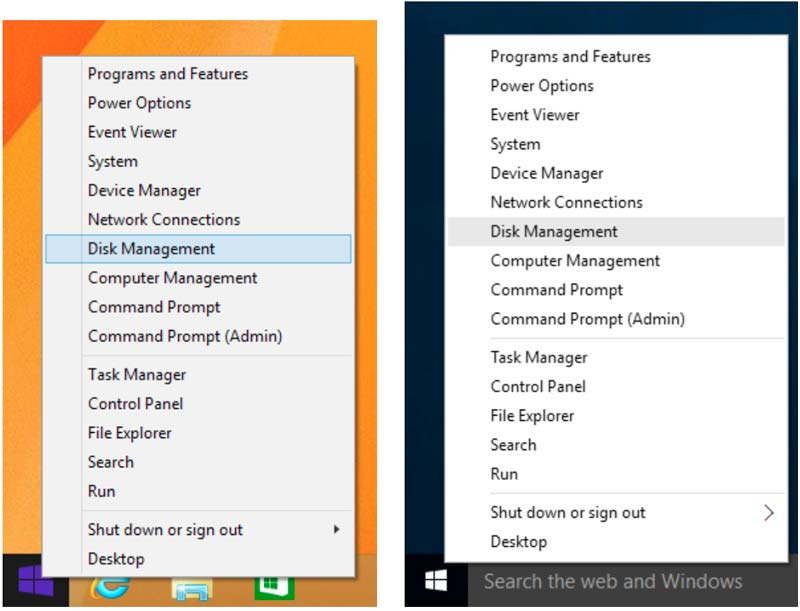
Windows 8, Windows 10
STEP 1: Initialize a Disk
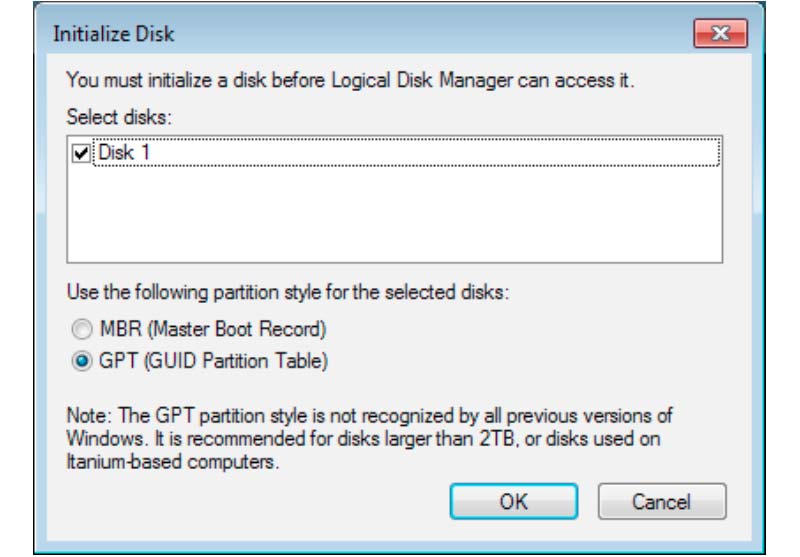
Once you've chosen a partition scheme, click "OK". If you do not see this message box move to Step 2.
STEP 2: Select Your Drive
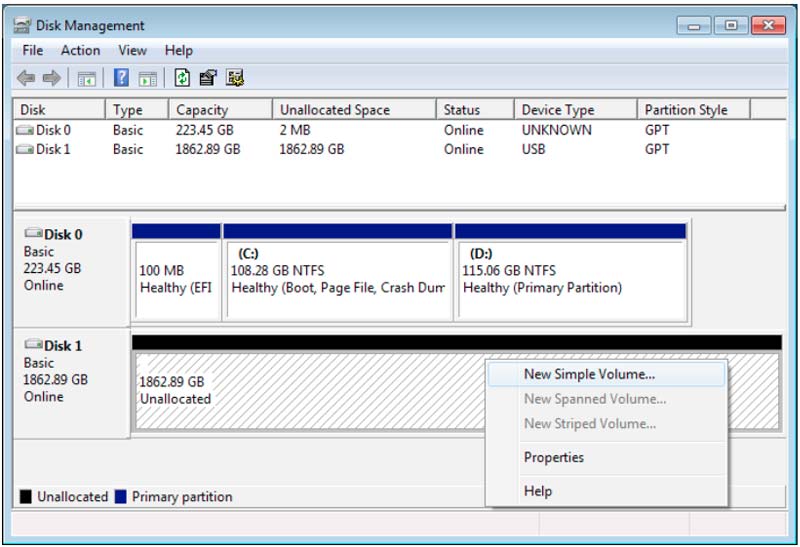
Select the disk by clicking within the region displayed as "Unallocated," then right-click and choose "New Simple Volume."
STEP 3: Simple Volume Wizard
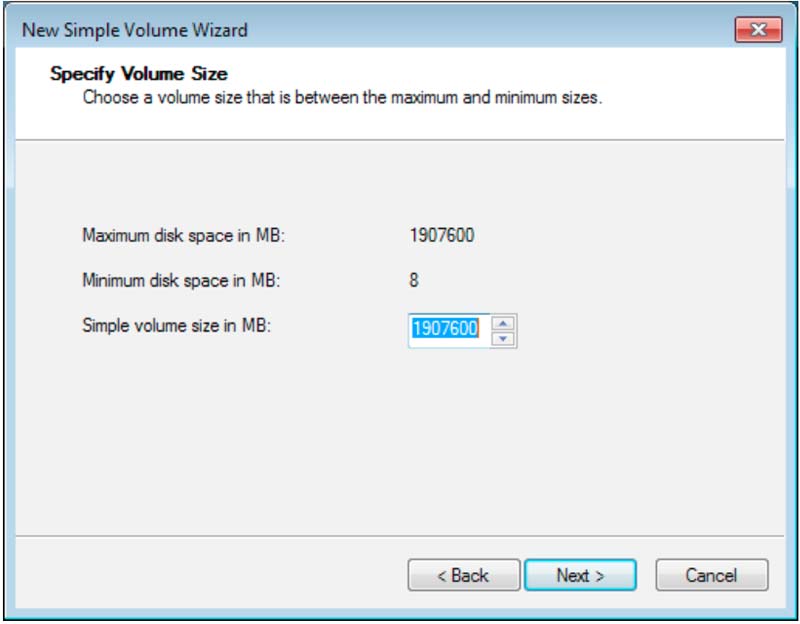
Click "Next" once the "Simple volume size" is set.
STEP 4: Assign a Drive Letter
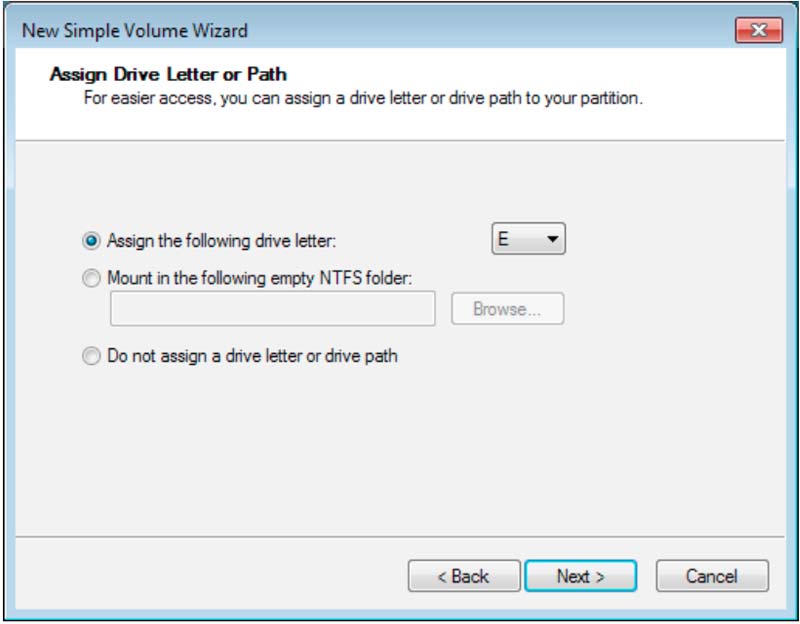
Once the drive letter is set, click "Next".
STEP 5: NTFS
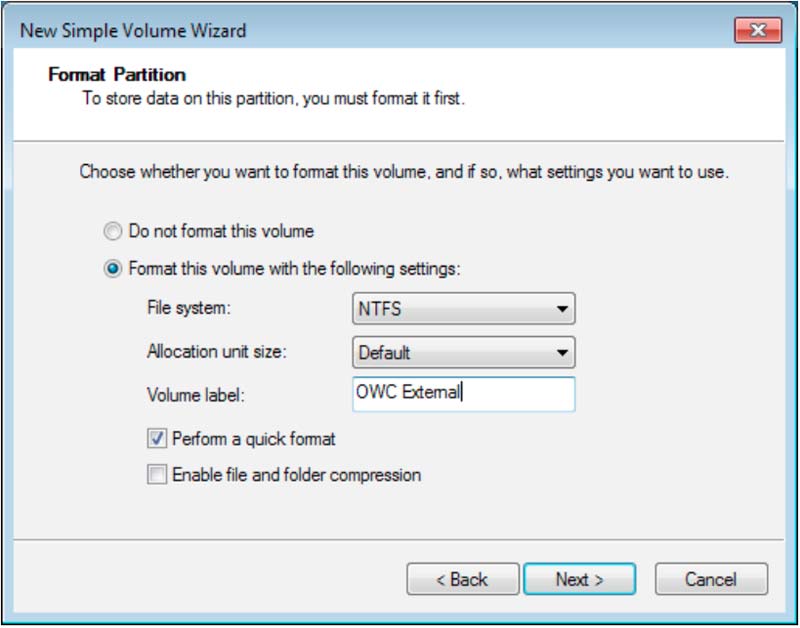
Next, enter the drive name in the "Volume label" field. It is a good practice to use only letters, spaces, underscores, dashes, and numbers. For general purpose use, leave the default "Perform quick format" option checked, and leave the "Enable file and folder compression" option unchecked.
Once these options are set, click "Next".
STEP 6: Format Success
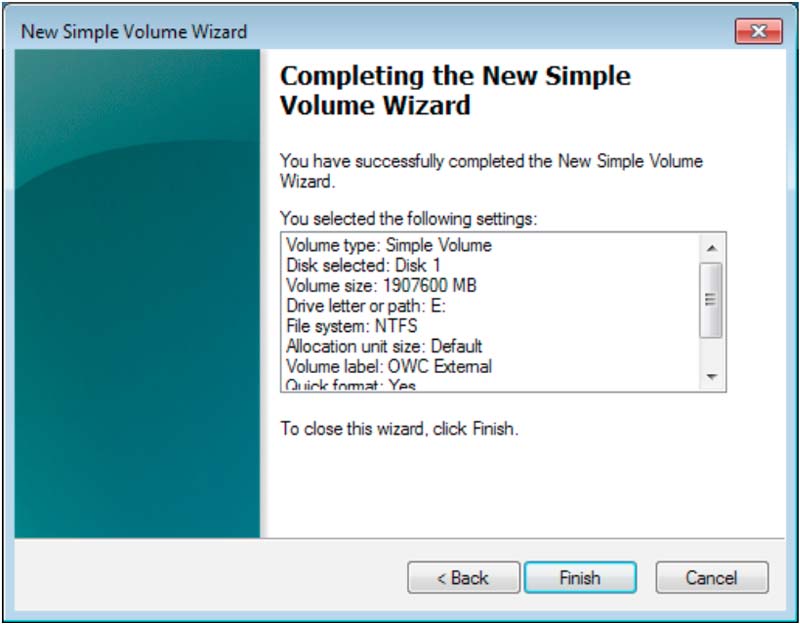
Click "Finish" when you're done reviewing them.
STEP 7: View Your New Drive
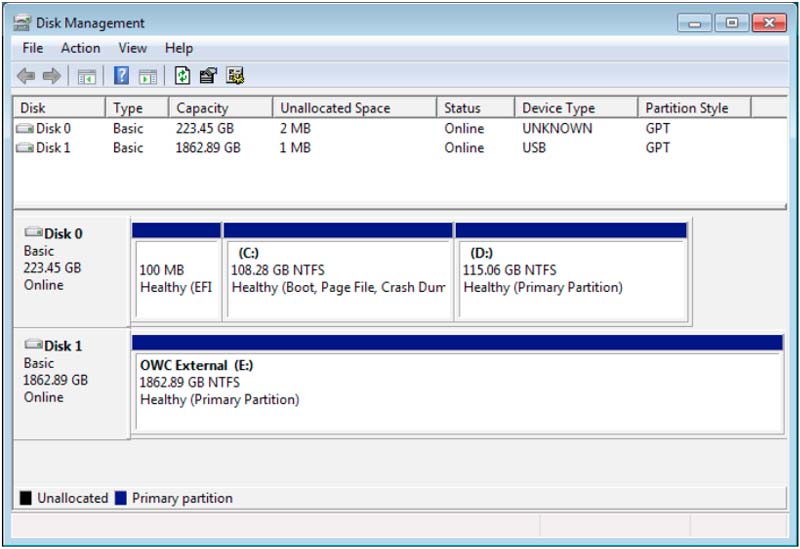
Congratulations, you are now ready to use your newly formatted windows drive!
*Optional* Step 8a – Format Changes:
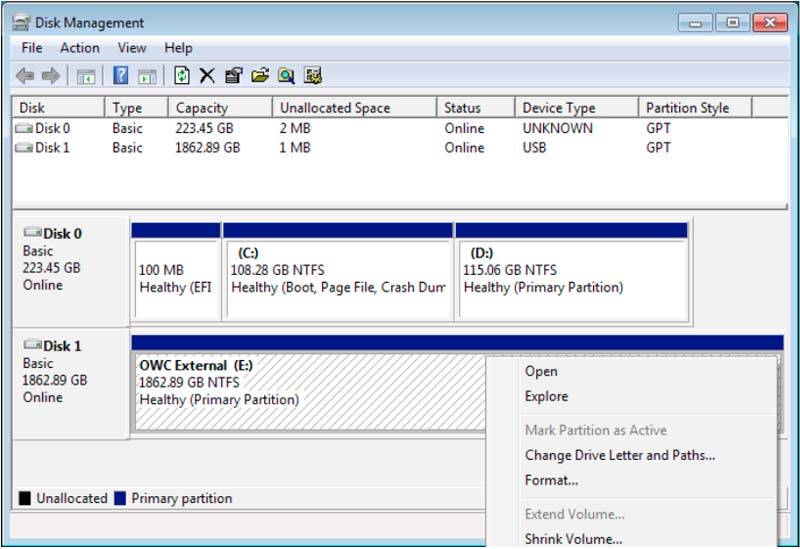
To do this, just re-open the Disk Management window, select your drive, then right-click in the allocated space. Choose "Format..."
*Optional* Step 8b – Format Changes:

You will see a warning that "Formatting this volume will erase all data on it." If you’re OK with this, click "OK". Otherwise click "Cancel", exit Disk Management and back up the files you need to back up, before returning to Disk Management to reformat the drive to ExFat.
*Optional* Step 9 – Volume Size Changes:
If the drive is formatted with the NTFS file system, you can shrink, extend, or delete the volume by right
clicking on the allocated space in Disk Management and choosing the desired option and using the
Volume size controls. When you shrink a volume it will create more unallocated space so that you can
create additional volumes if needed.
For more information on this please visit:
https://technet.microsoft.com/en-us/library/cc733060.aspx
For more information on this please visit:
https://technet.microsoft.com/en-us/library/cc733060.aspx