
NewerTech NuDrive Guide
Introduction
The NewerTech NuDrive is a formatting application built for Mac® and Windows® users who require a simple walk-through of the hard drive or SSD formatting process.
NuDrive uses standard Mac and Windows formatting options to create the volumes needed to store information on your new drive. The benefit is a standard format, created with steps that are easier for many users to understand.
NuDrive uses standard Mac and Windows formatting options to create the volumes needed to store information on your new drive. The benefit is a standard format, created with steps that are easier for many users to understand.
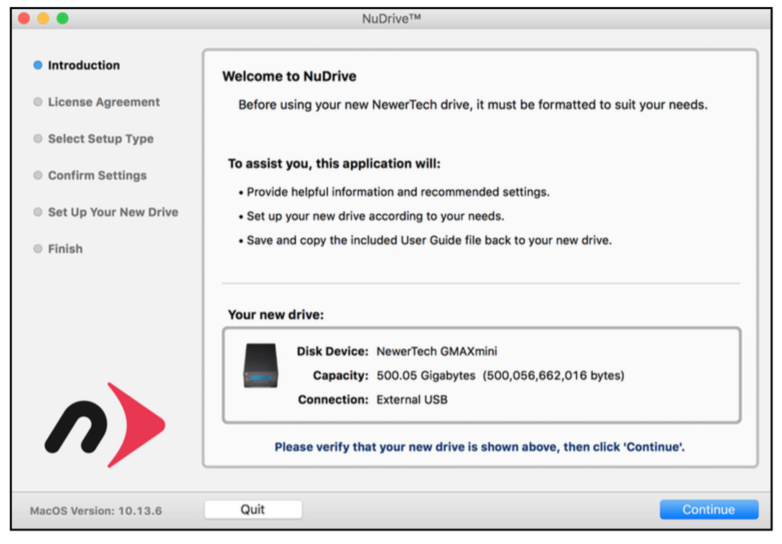
STEP 1

STEP 2
Double-click the ‘NuDrive’ icon to open the first setup screen. You will have to enter the password for your user account before the screen appears.
STEP 3
STEP 4
Review the User License Agreement (not pictured) and if you agree with the terms, click ‘Accept’ to continue the process.
STEP 5
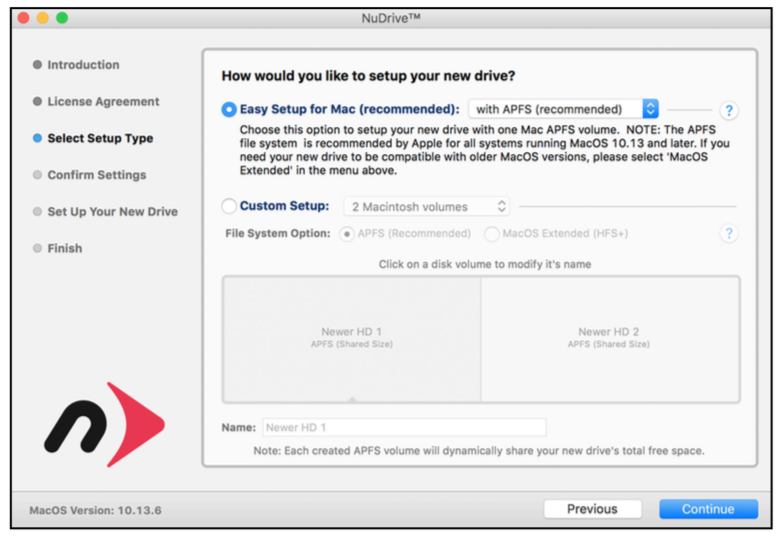
APFS will be selected for Macs running macOS 10.13 or later; HFS+ will be used for Macs running earlier versions of the OS. Windows drives will default to NTFS.
If you intend to format your disk with multiple partitions or custom settings, please skip ahead to page 5.
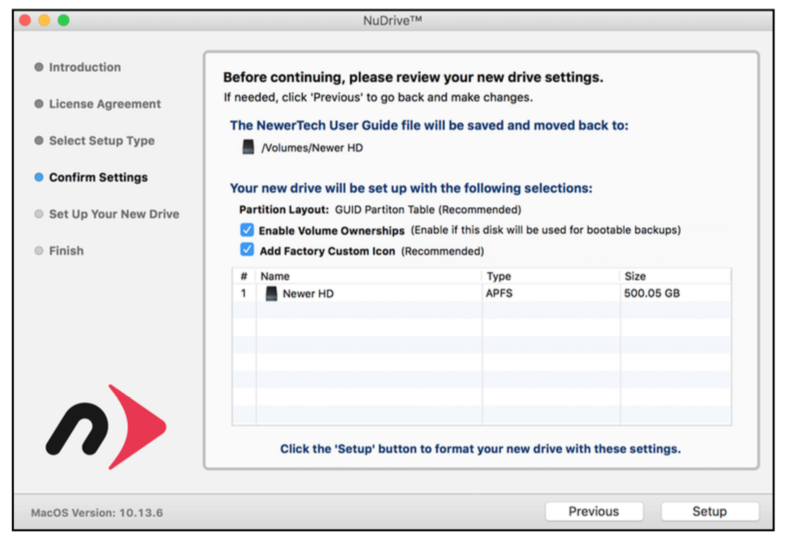
STEP 6
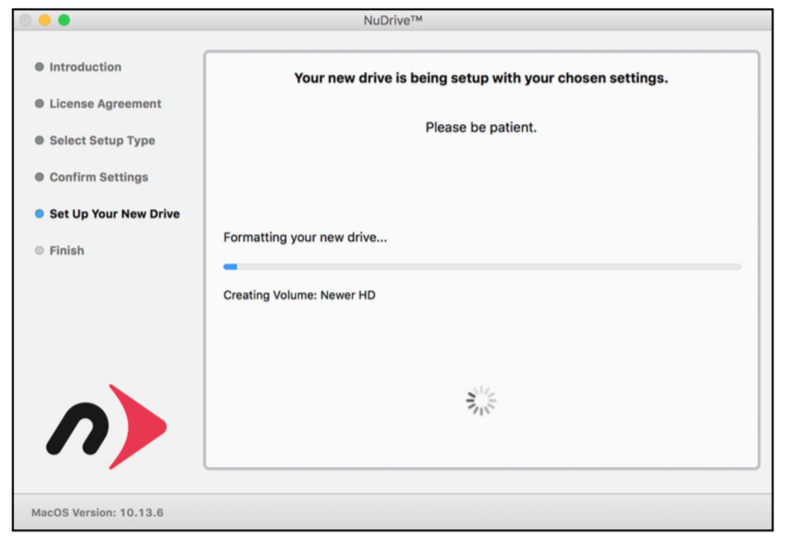
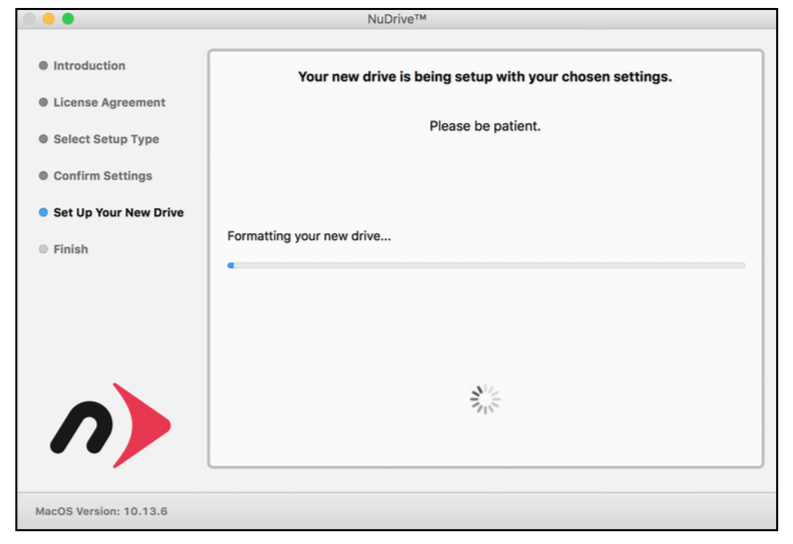
STEP 7
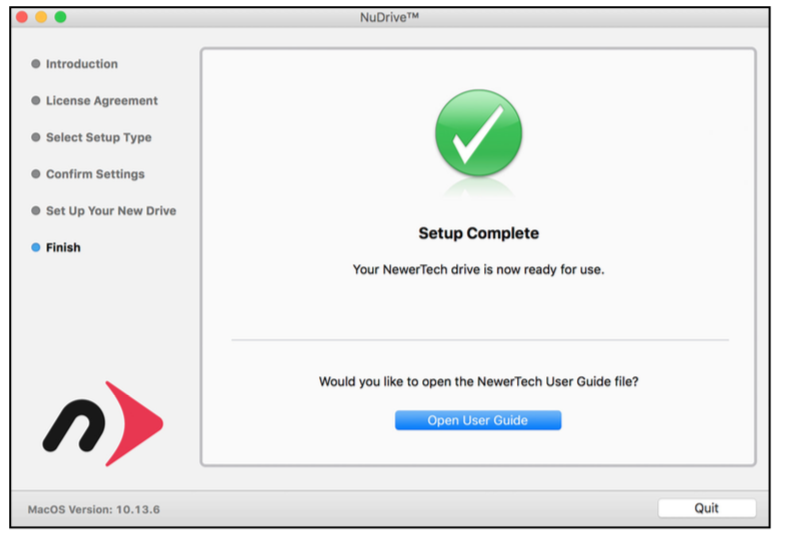
STEP 8
STEP 5 (Custom Setup option)
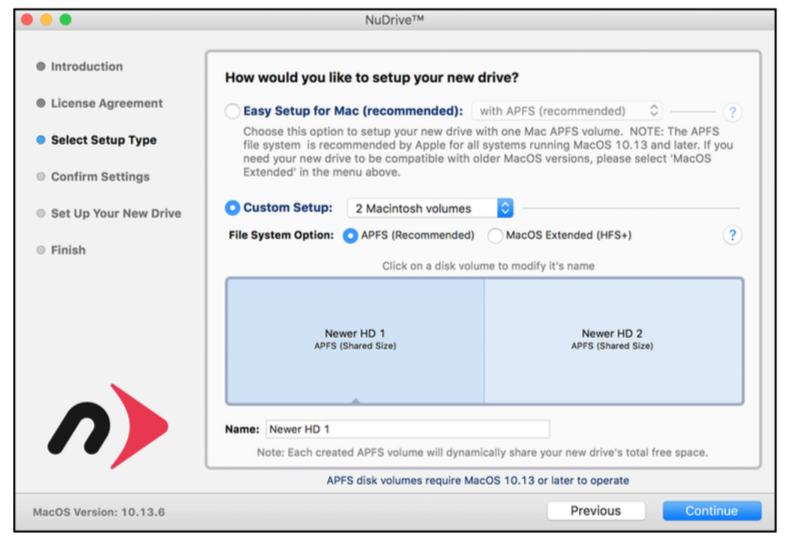
APFS will be selected for Macs running macOS 10.13 or later; HFS+ will be select for Macs running earlier versions of the operating system. Windows drives will default to NTFS.
STEP 6 (custom)
STEP 7 (custom)
To change the size of one volume relative to another, drag the vertical divider(s) in the blue box to the left or right. As one volume is made larger, the other decreases in size by the same amount. Note: this step is not needed for users of macOS 10.13 or later; the system automatically allocates space for APFS volumes within a disk container.
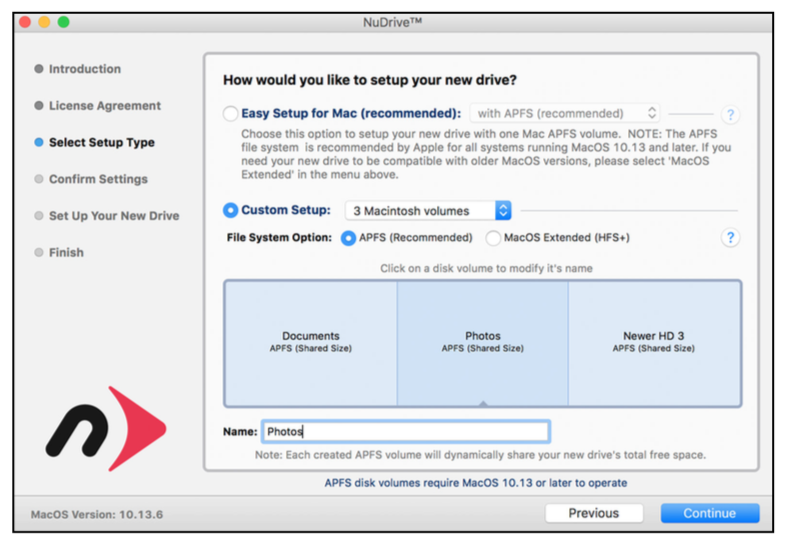
STEP 8 (custom)
To give each volume its own name, highlight each section of theblue box, then type into the “Name” field. When you’re done click ‘Continue.’
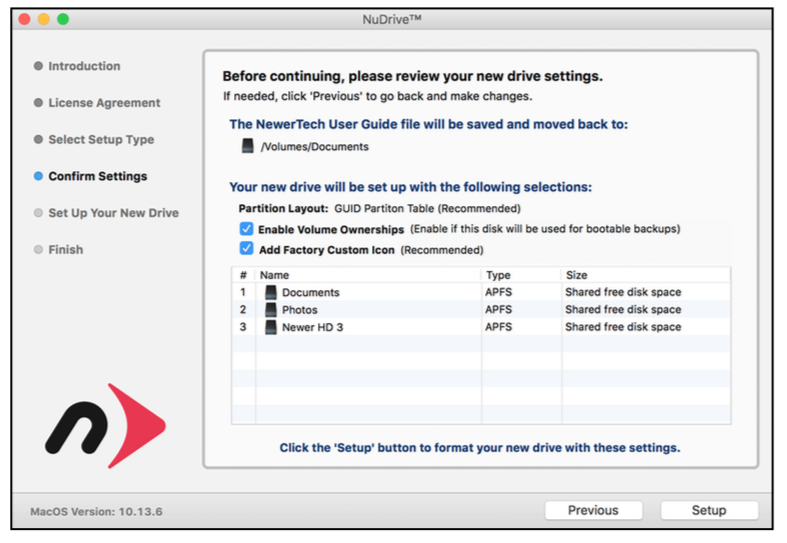
STEP 9 (custom)
STEP 10 (custom)
STEP 11 (custom)
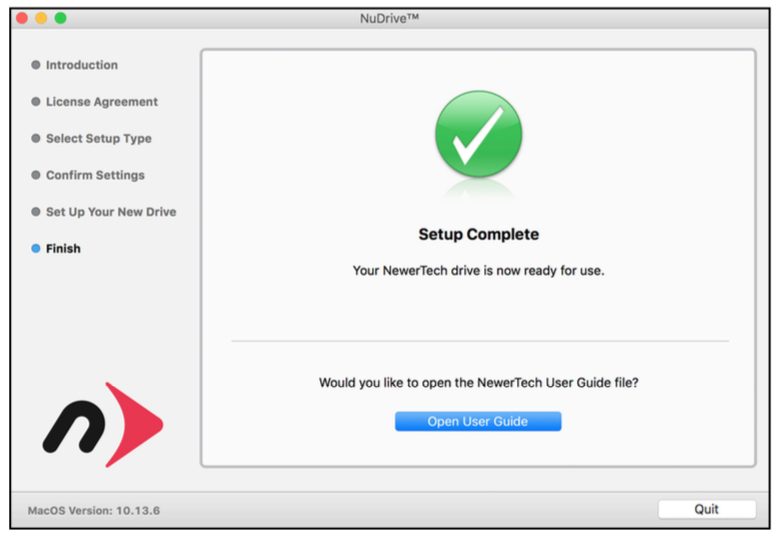
ADDITIONAL RESOURCES
If you would like to like to learn about the settings that Drive Guide uses, or about other methods to format your drives for Mac and PC, please visit the links below.
Mac (OS 10.12 or earlier)
https://support.apple.com/kb/ph5845?locale=en_US
Mac (OS 10.13 or later)
https://support.apple.com/guide/disk-utility/partition-a-physical-disk-dskutl14027/mac
Windows:
https://support.microsoft.com/en-us/help/17418/windows-7-create-format-hard-disk-partition
Mac (OS 10.12 or earlier)
https://support.apple.com/kb/ph5845?locale=en_US
Mac (OS 10.13 or later)
https://support.apple.com/guide/disk-utility/partition-a-physical-disk-dskutl14027/mac
Windows:
https://support.microsoft.com/en-us/help/17418/windows-7-create-format-hard-disk-partition
Copyright 2006 – 2026 Newer Concepts Development Corporation, Site Index, Privacy Policy
Apple, Apple TV, FireWire, iBook, iMac, iPad, iPad Air, iPhone, iPod, iPod classic, iPod nano, iPod touch, Lightning, Mac, MacBook, MacBook Air, MacBook Pro, Mac mini,
macOS, Mac Pro, MagSafe, PowerBook, OS X, Retina, and Time Machine are trademarks of Apple Inc., registered in the U.S. and other countries. iPad mini is a trademark of Apple, Inc.
Do Not Sell or Share My Personal Information
macOS, Mac Pro, MagSafe, PowerBook, OS X, Retina, and Time Machine are trademarks of Apple Inc., registered in the U.S. and other countries. iPad mini is a trademark of Apple, Inc.
Do Not Sell or Share My Personal Information