
Formatting Instructions for Microsoft® Windows® XP & Windows 2000
Your Newer Technology Storage Solution is preformatted using the Mac OS HFS+ file system. If you are using the storage solution on anything other than a Mac, you will need to reformat. Formatting instructions for operating systems other than Microsoft Windows XP/2000
are available at http://www.newertech.com/format
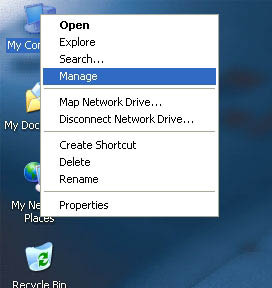

STEP 1
With the drive connected to the computer and powered on, right click on the My Computer icon and choose Manage.
Choosing this option will bring up a screen like the one below.
If the wizard window doesn't appear please expand storage by clicking on the plus sign and then right click next to the disk number that you have just connected and click Initialize to bring up the Wizard.
Choosing this option will bring up a screen like the one below.
If the wizard window doesn't appear please expand storage by clicking on the plus sign and then right click next to the disk number that you have just connected and click Initialize to bring up the Wizard.
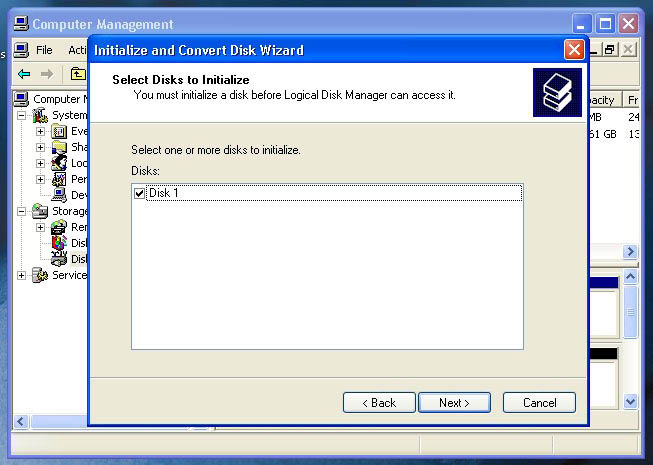
STEP 2
You should only have one disk shown here. That will be the drive that you connected via eSATA, FireWire or USB. Click Next.
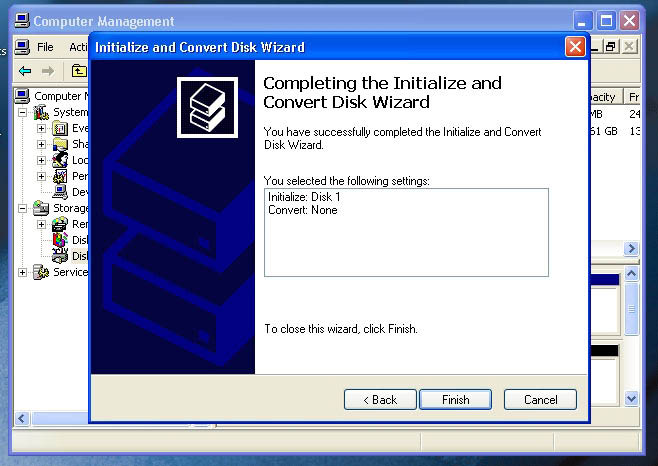
STEP 3
Click finish.

STEP 4
Your drive will appear similar to how Disk 1 does below.
Notice that the space on the right reads as Unallocated - Right click in the Unallocated space and choose New Partition.
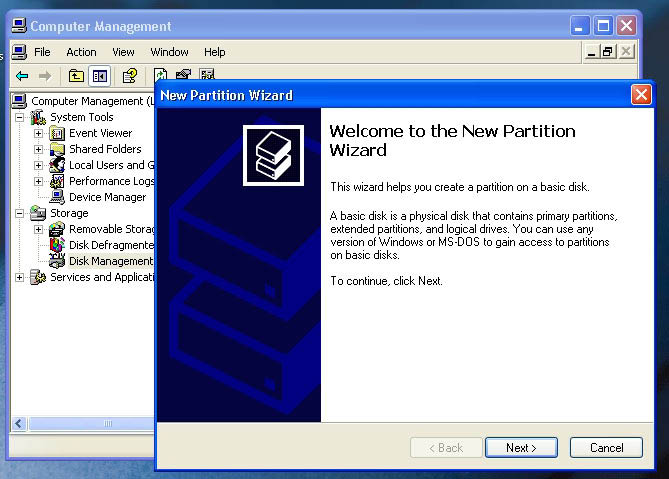
STEP 5
This starts the New Partition Wizard.
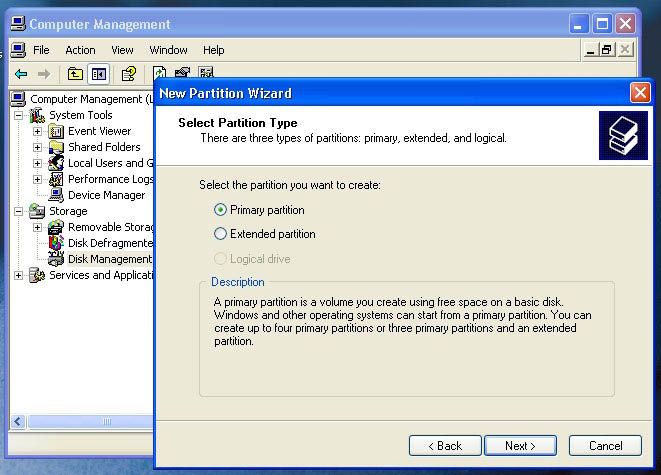
STEP 6
Specify your partition type as Primary.
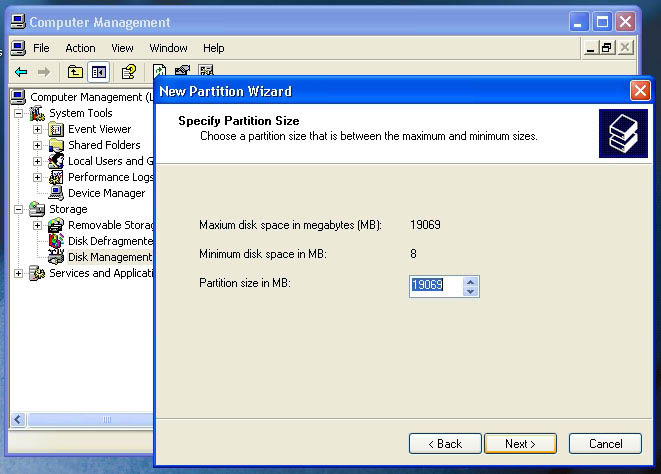
STEP 7
The wizard will already display the appropriate partition size for your drive. It is strongly recommended that you DO NOT change the default value.
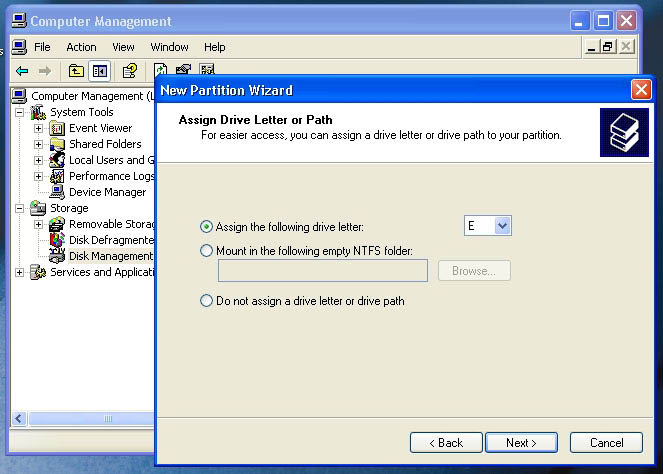
STEP 8
If you would prefer, you can specify the drive letter designation for your new drive. If not, the OS will assign one for you.
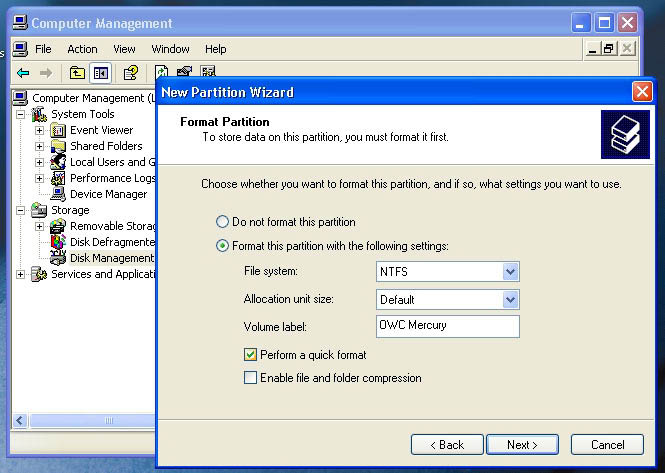
STEP 9
Before you can use the drive, it must be formatted. On most Windows 2000 and Windows XP systems, it is advisable to specify the file system as NTFS. Leave the Allocation Unit Size as Default, and feel free to give the drive whatever name you prefer. Check the box for Quick Format. If you do not, it will likely take several hours for your drive to format.
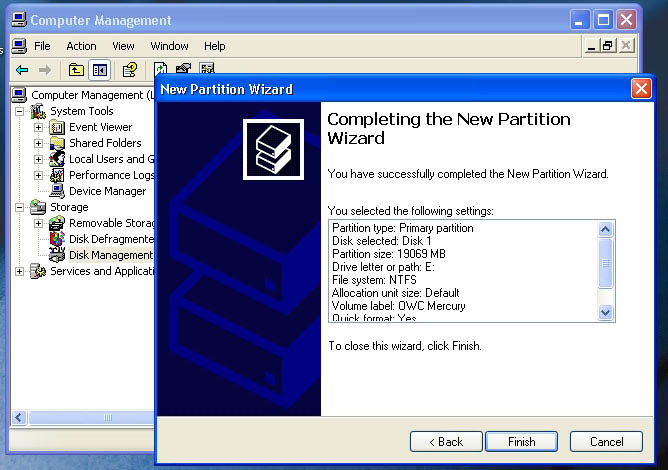
STEP 10
At the end of the Wizard, you will see a summary of the information you have specified throughout the steps. Click Finish.
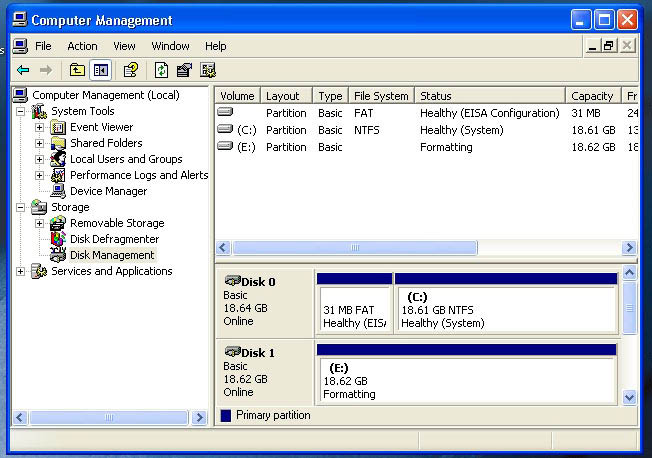
STEP 11
Once you have finished with the formatting wizard, you will see that your new drive (represented as E in this case) will display a message of Formatting. This should only take a couple of minutes if you chose the Quick Format option.
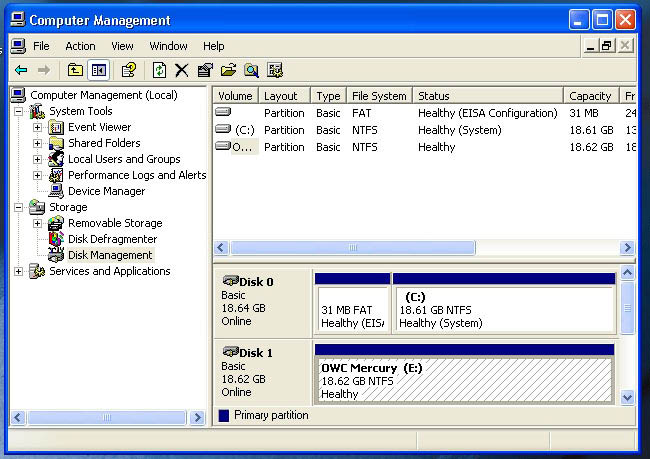
STEP 12
Watch closely, because the Formatting message will disappear quickly and be replaced by one that says Healthy.

STEP 13
If you open the My Computer icon on your desktop, you will see your new drive mounted and ready to use. You're all set!